Machine Introduction
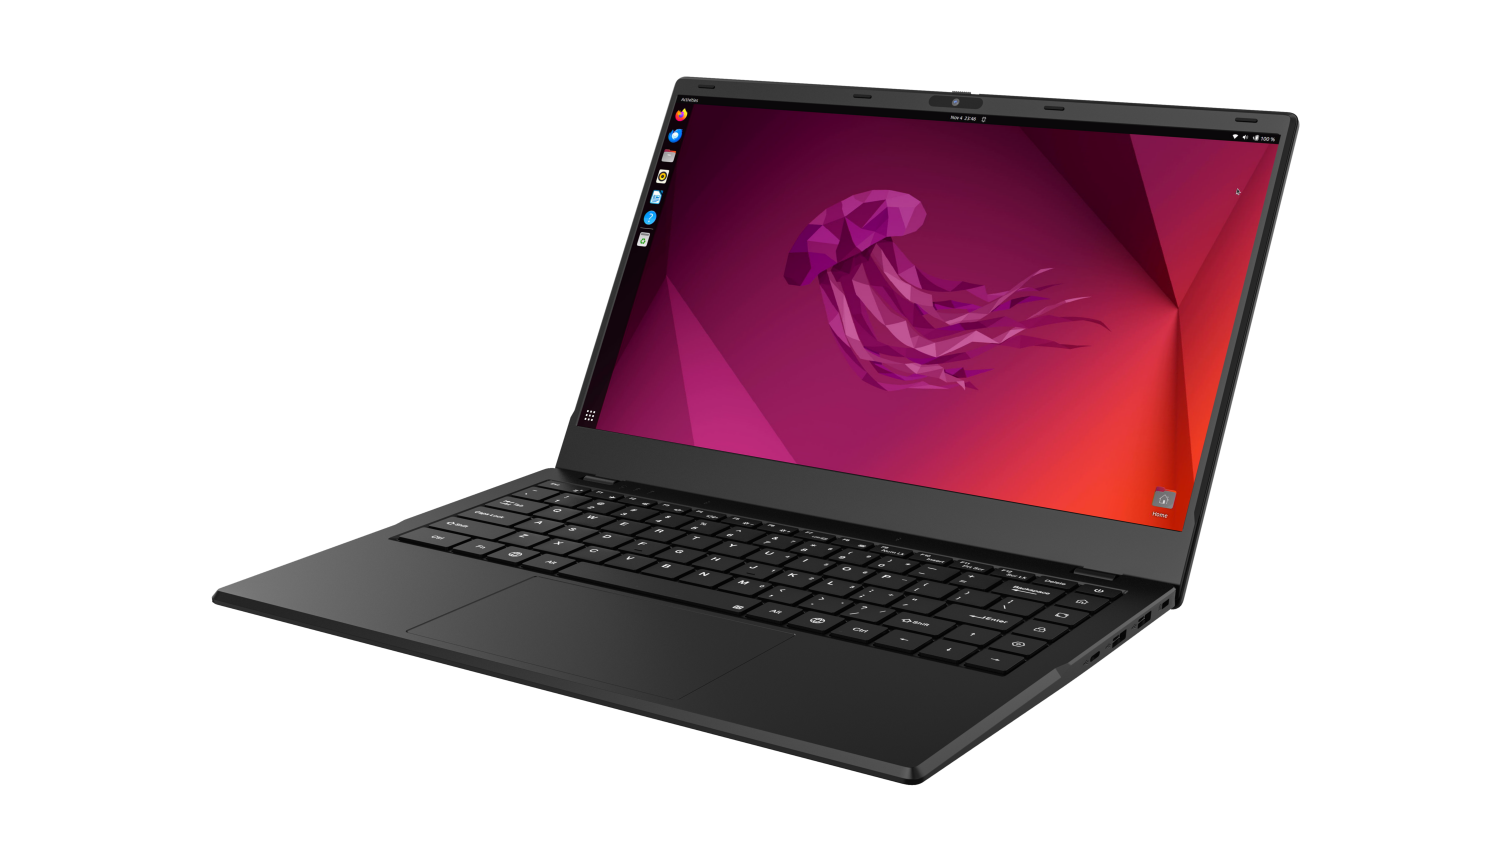
COOLPI CM5 open-source notebook is a product that combines high performance, portability, and open-source spirit. It not only meets the basic computing needs of users, but also provides an ideal platform for those who enjoy free exploration and technological creation.
Installing the system
The machine is installed with Ubuntu 22.04 system by default at the factory. If users need other versions, they can update them according to the following tutorial.
The default username for the machine is: coolpi Password: 123
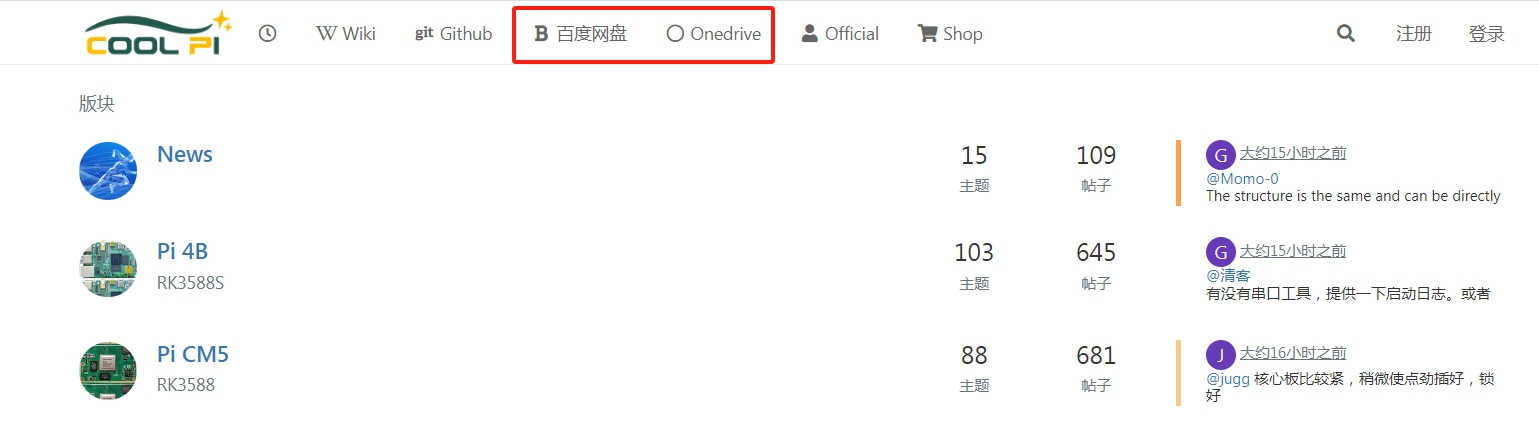
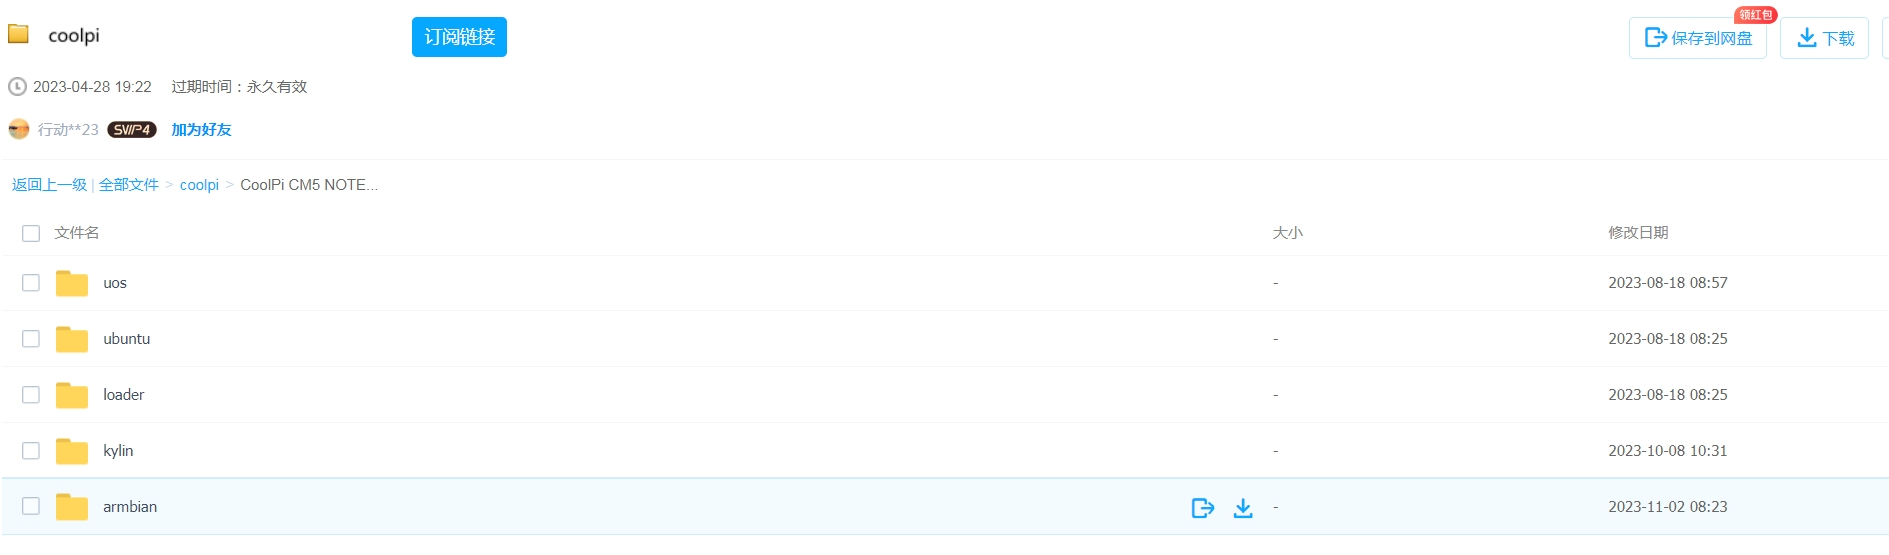
Download image
As shown in the following figure: System images can be downloaded through 百度网盘 or Onedrive.
Select the image that needs to be updated, and the image type will continue to be updated.
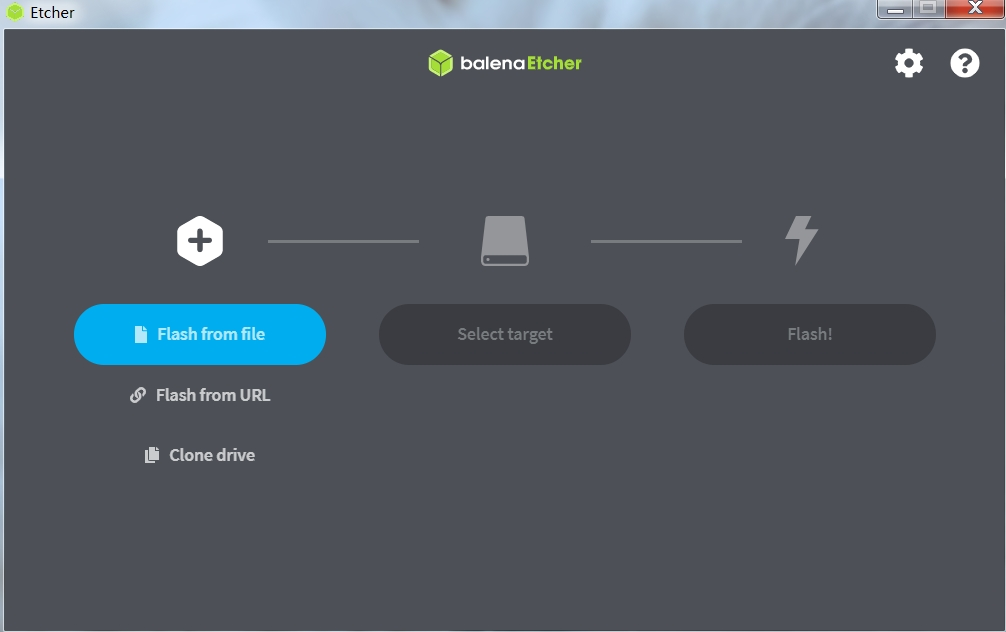
Download tools
Coolpi defaults to using Etcher to update system images, which can be obtained through Baidu Cloud, Onedrive, or the official website.
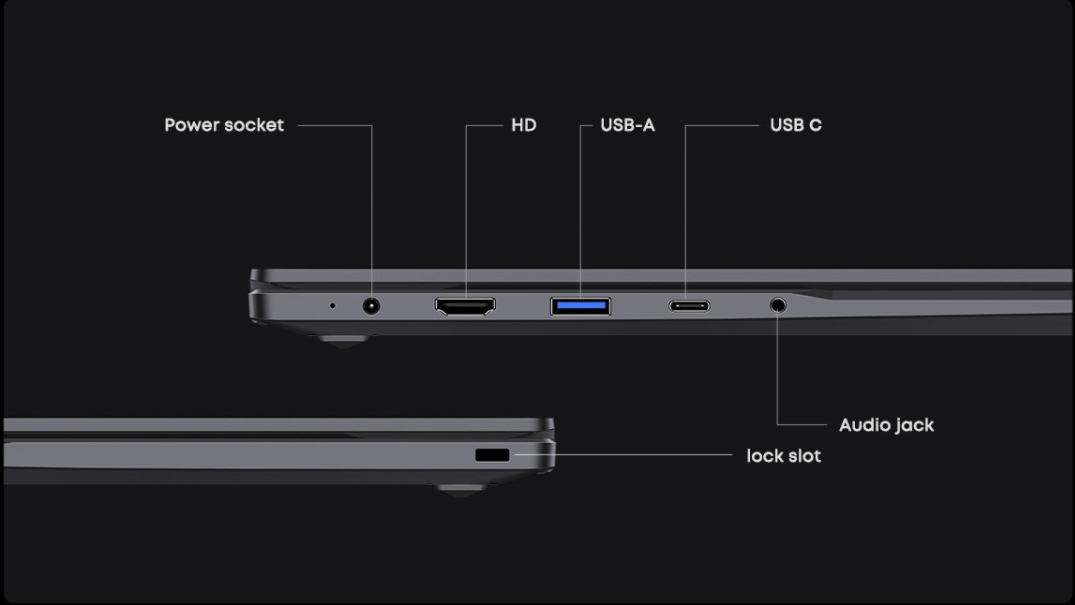
Machine enters UMS mode
The Type-C port of the machine is connected to the computer. When the Coolpi laptop is turned off, it can quickly press the power button multiple times, usually no less than 8 times, and the machine will enter MUS mode. The computer will recognize an icon for a USB drive. As shown in the following figure:
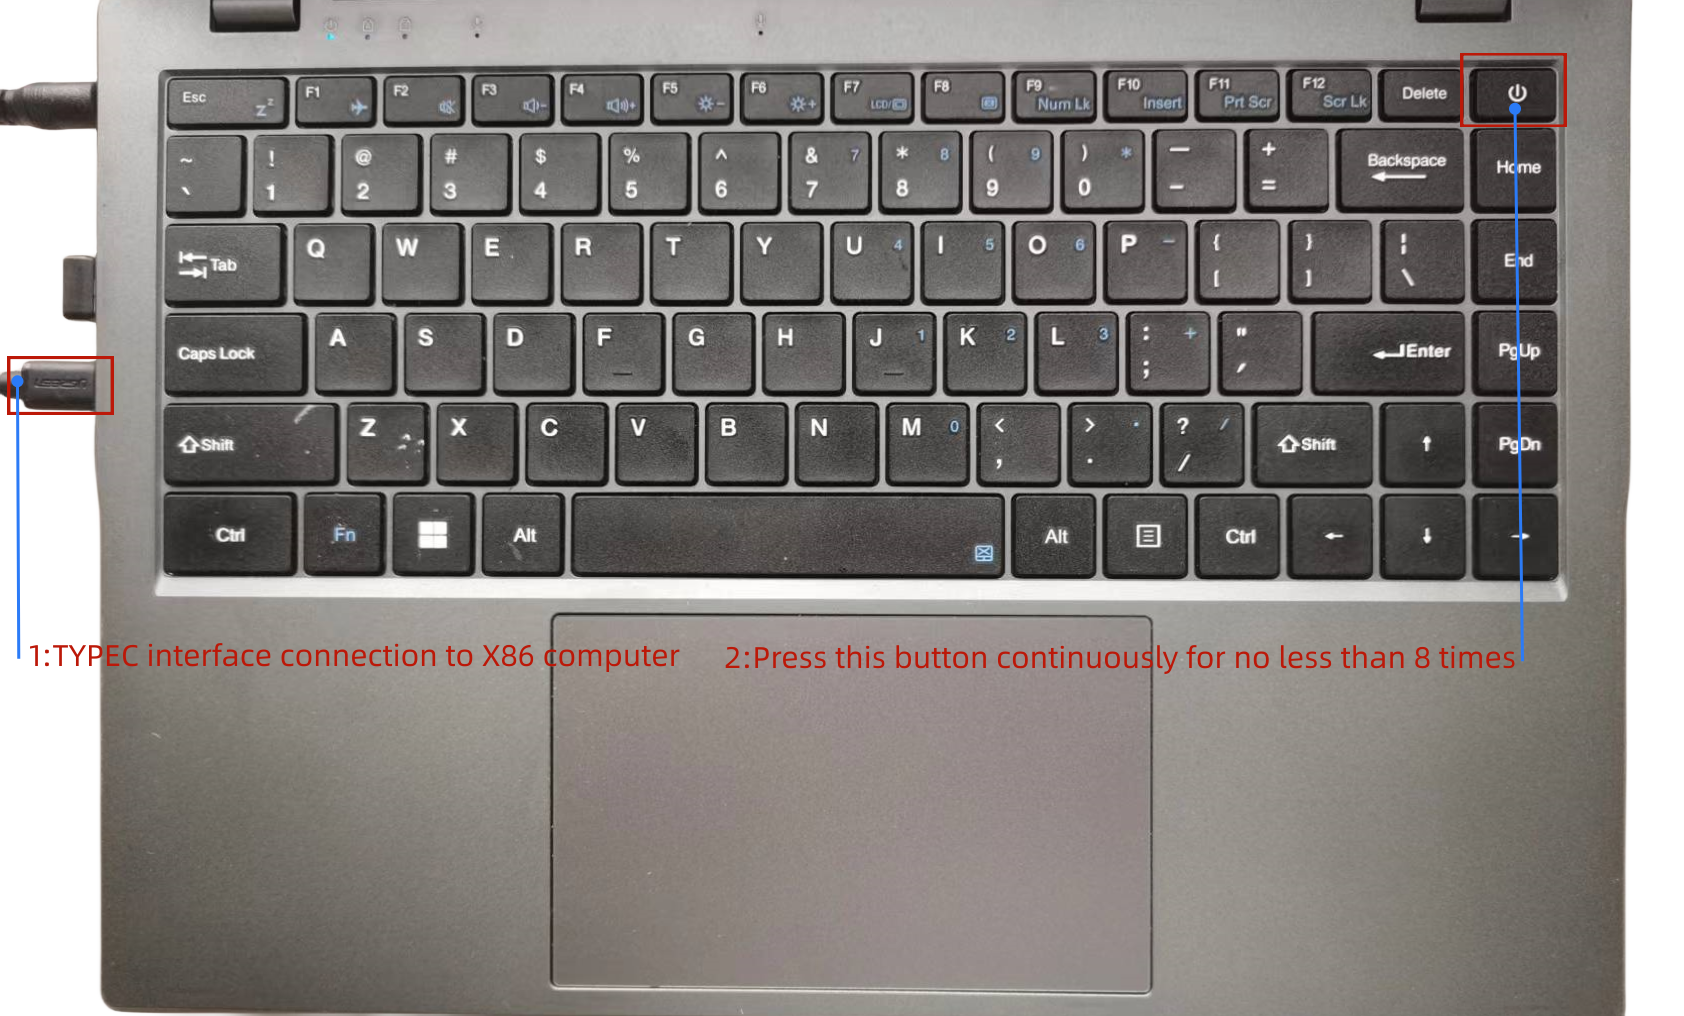
The X86 computer will recognize a UMS device.
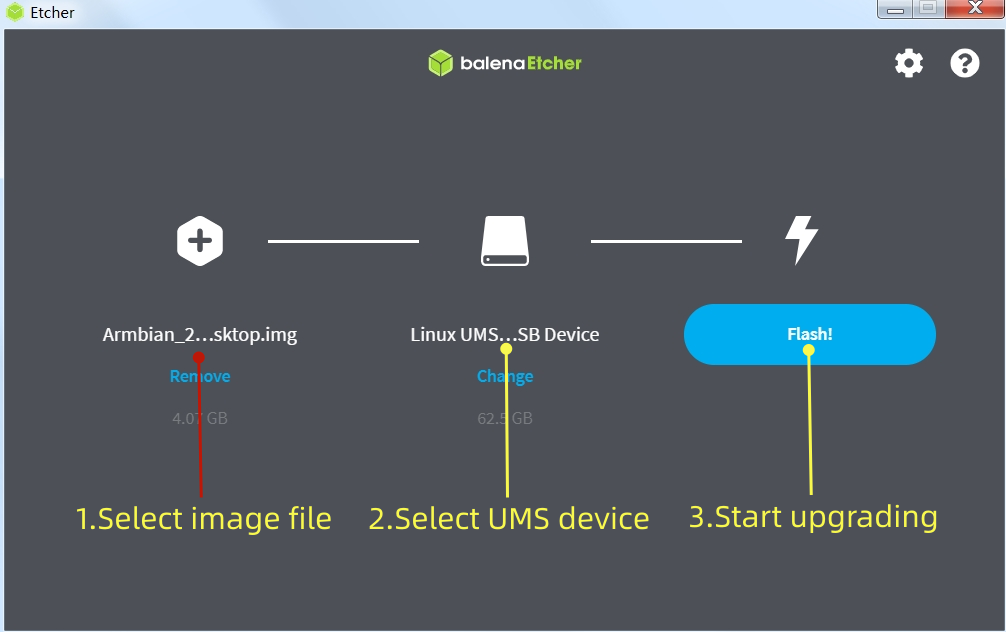
Load image and flash
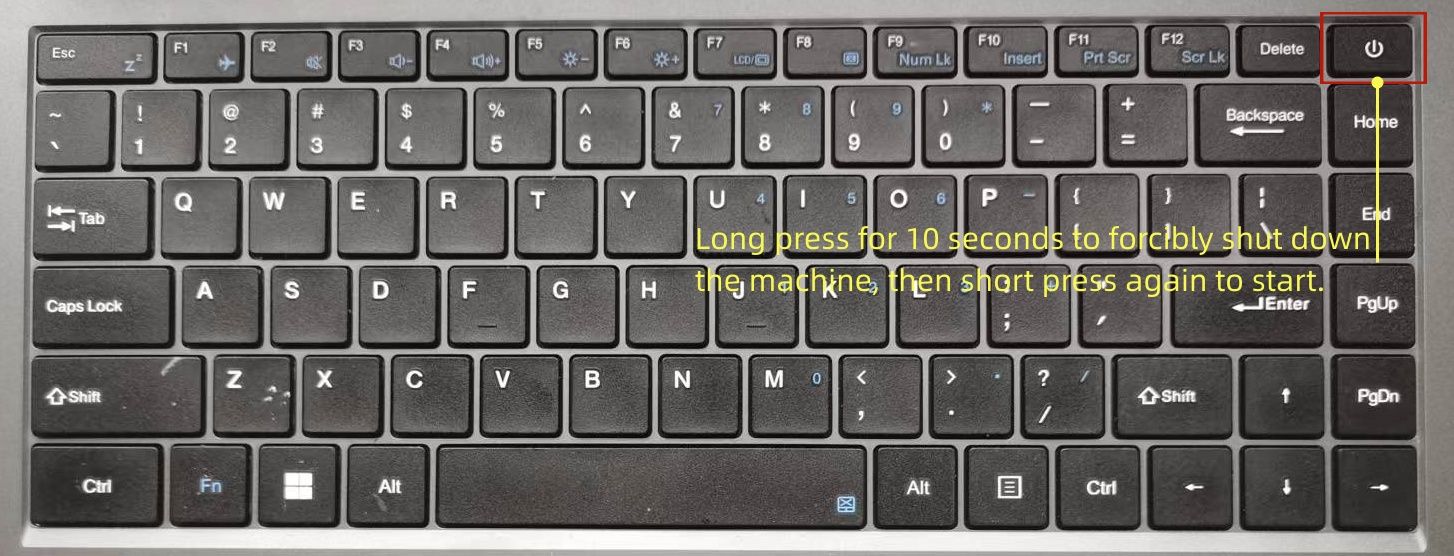
Follow the three steps shown in the figure to burn the image file. After the burning is completed, a forced restart is required. The method of forced power down is to continue holding down the power button for 10 seconds.
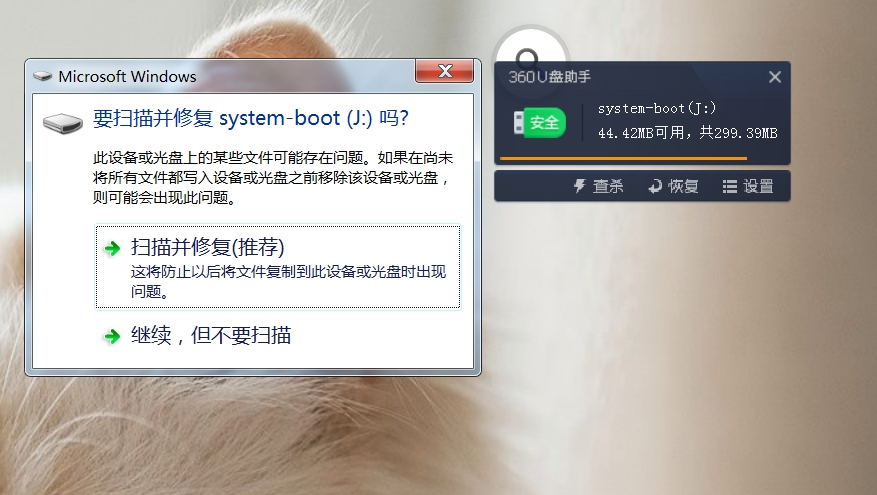
After downloading, restart the machine as shown in the following figure.
Update kernel
The kernel of Coolpi will continue to be updated, and users can also compile the mainline kernel themselves to upgrade the machine, following the steps below. The compilation of the kernel part in the following figure is completed on the Coolpi laptop, and users can also cross compile on the X86 computer. The method and steps are the same.
Synchronize kernel
sudo apt-get update
sudo apt-get upgrade
sudo apt-get install git
git clone https:
Compile kernel
First, install the git toolkit, and it is best to update the system to the latest version before installation. Install some kernel dependent packages, then run the compilation script, enter numbers to select the corresponding machine model, and the compilation can proceed normally.
sudo apt-get install flex bison libssl-dev
sudo ln -s /usr/bin/python3.10 /usr/bin/python
cd coolpi-kernel
./build-kernel.sh
Welcome to using Coolpi Development Board!
------------------------------------------
Please enter a number to select your machine

1. cp4b
2. cp4b-hdmi-in
3. cm5-evb
4. cm5-evb-v11
5. cm5-minipc
6. cm5-notebook
7. cm5-notebook-v20
8. cm5-8uart
9. cpnano
10. exit

Enter option number: 7
Upgrade machine kernel
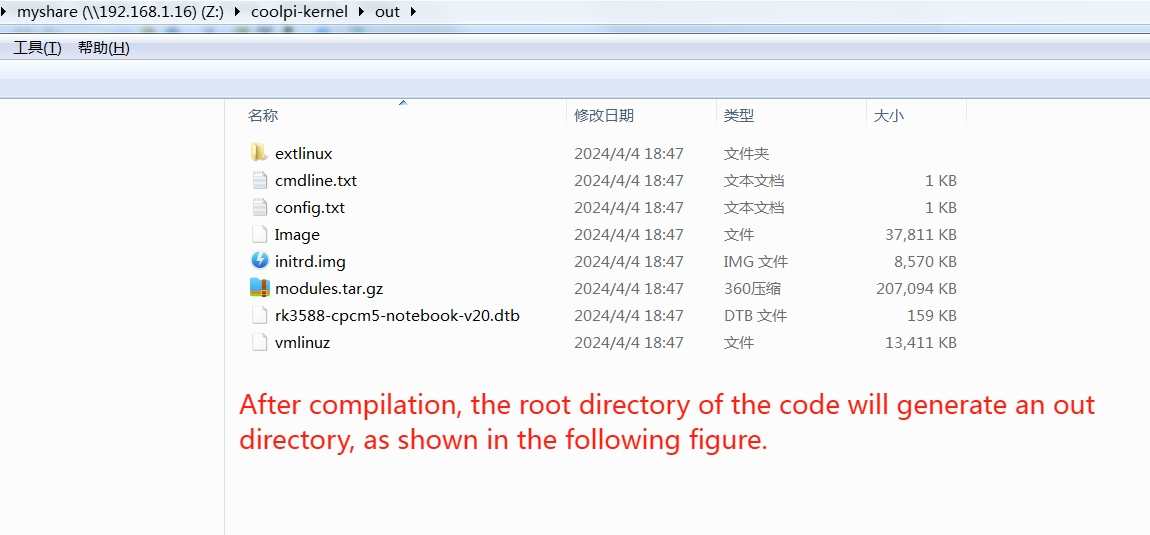
After the normal compilation of the kernel, an out folder will be generated with the directory, which contains all the files required by the kernel. You can update the newly compiled kernel to the machine by using the following command.
Use the following command to update the kernel.
sudo cp ./out/* /boot/firmware -R
sudo rm /lib/modules/* -R
sudo tar -zxvf ./out/modules.tar.gz -C /lib/
sync
sudo reboot
If the kernel was cross compiled using X86 machines, the kernel can be updated using the following methods:
- Use the Samba shared folder to copy the compiled files to the Coolpi machine.
- Use mobile storage devices such as USB drives to copy.
- The coolpi machine enters UMS mode, connects to the X86 computer, enters the USM mobile disk, deletes all files, and copies all files in the generated out directory to the UMS mobile disk. Then force a restart of the Coolpi laptop.
Change the startup logo
Users can update the startup logo of the machine by copying files, using the following command.
sudo cp ./logo.bmp /boot/firmware
sync
sudo reboot
Below is a standard format for a logo file that users can download and modify. Please note that the pixel size, name, and format of the file should not be changed.
logo.zip
Frequently asked questions
The machine cannot enter UMS mode
Due to incomplete image updates, the partition table of EMMC is damaged, and the machine cannot enter UMS burning mode. The following methods can be used to repair the EMMC partition table.
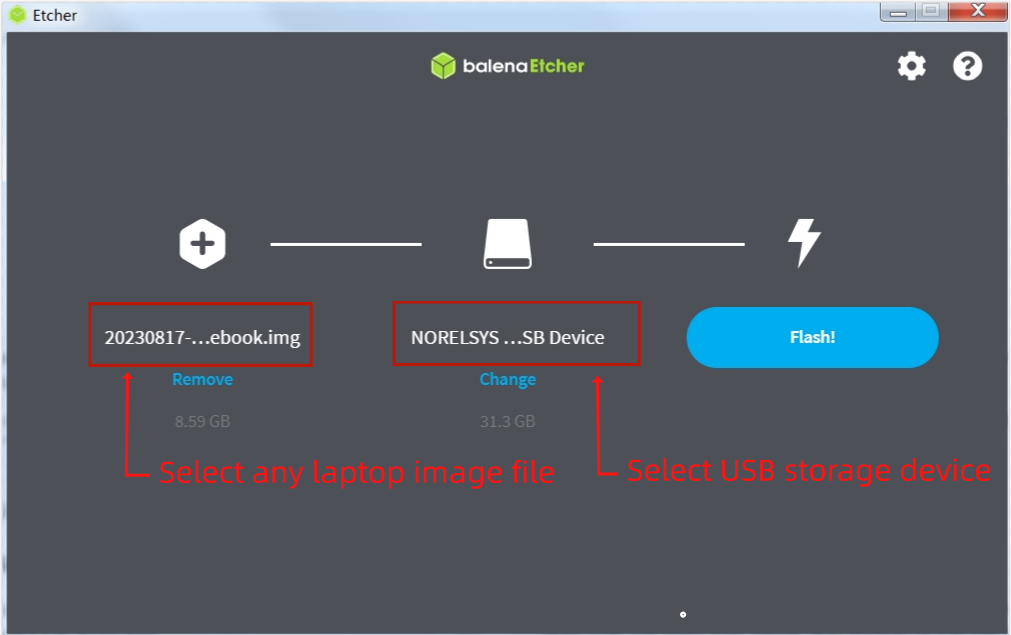
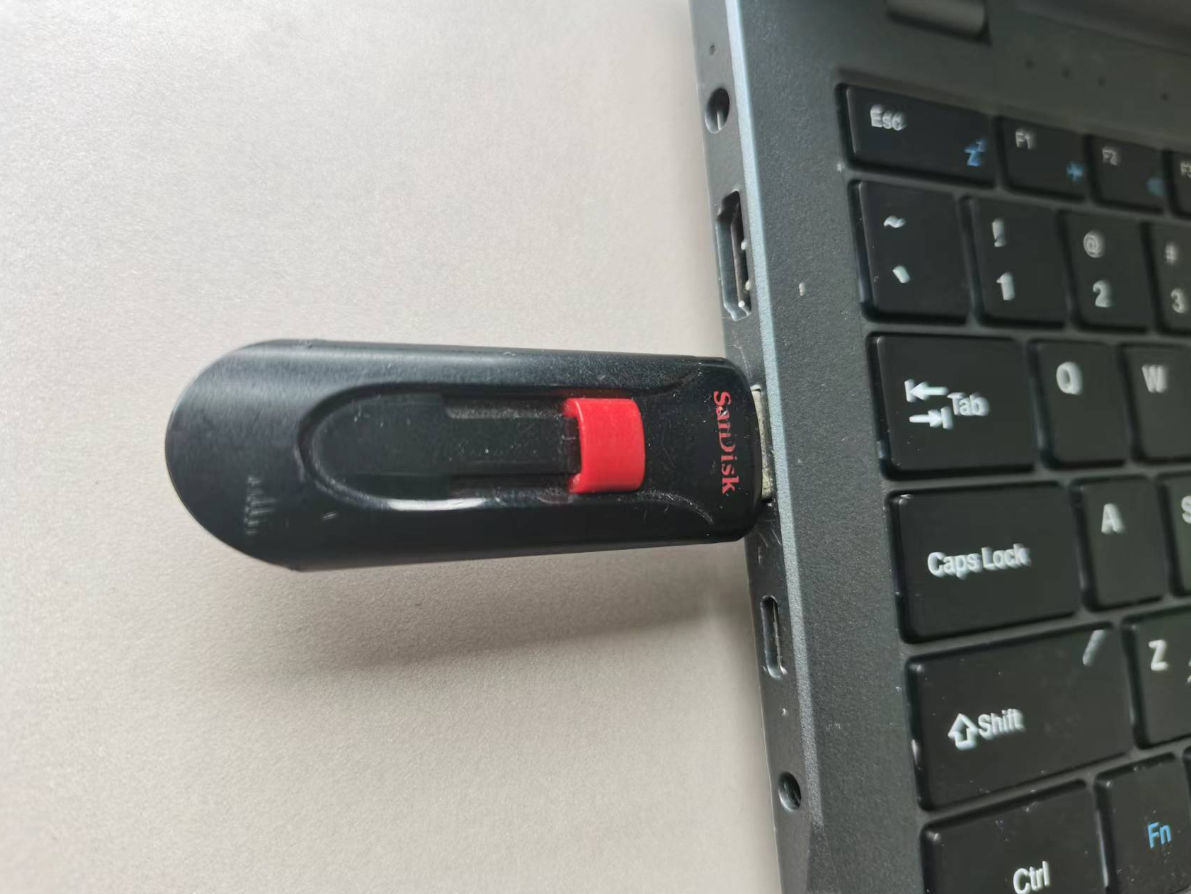
- A USB interface mobile storage device with a capacity of no less than 16GB, and an X86 computer can burn any image to the USB device through ETCHER software.
- Insert USB storage device into the USB interface of the Coolpi laptop
- The machine will first start from the USB storage device when turned on. Then enter the system. Format EMMC using the following command.
sudo mkfs.ext4 /dev/mmcblk0